Occasionally, you face the problem “DNS Server is not Responding” while you are surfing internet. For newbie, DNS server is the “Domain Name Server” that translates and then fetches the address of your required website to enable your access to it. When you type www.pingzic.com, it does not understand. It will translate it into 159.203.115.86 that is understandable for the server and fetches www.pingzic.com for you. When you lose connection, you have to check whether the server is working properly and there is no error in your system in order to fix this error.
Quick Note: Let me clear one thing here that this error is entirely different from “Your DNS server might be unavailable” error.
Methods to Fix DNS Server not Responding Problem – See Below
Disable All Unused Network Connections (Most Working Solution)
It is a proven fact that you can use an error-free network connection if you enable only a frequently used network connection. Disable all of the other connections to get an error-free connectivity. You need to follow the steps below to do so.
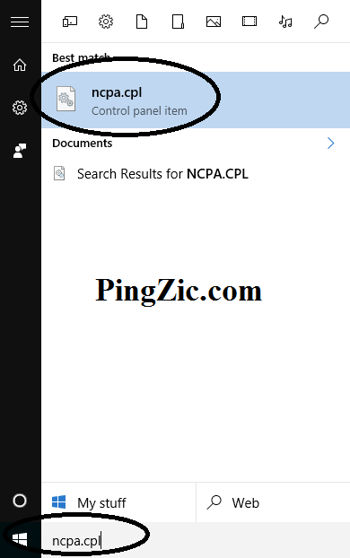
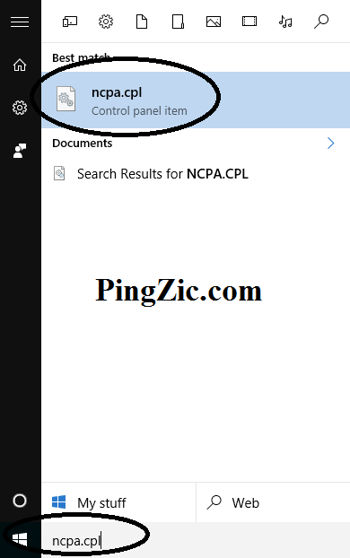
- Go to the start screen and press Windows key. You will get the Search bar where you need to type “ncpa.cpl” and press Enter.
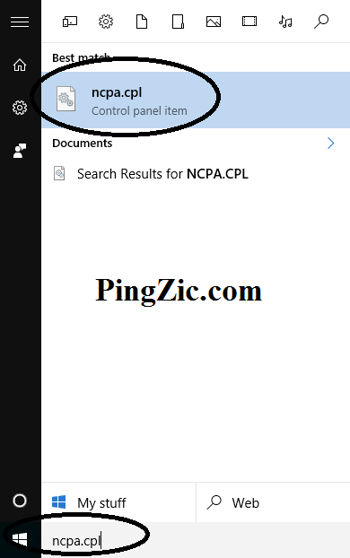
- It will take you to the “Network Connections” setting directly.

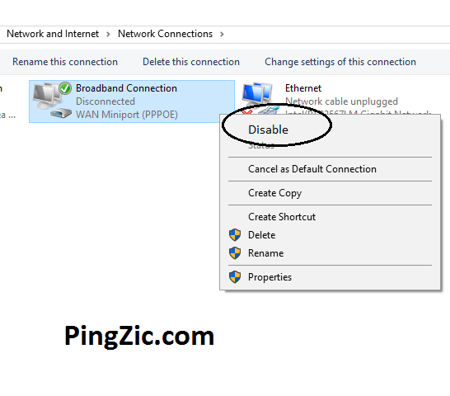
- Here, you need to disable every unused connection. Just keep enabled the connection you frequently use.
- Now try to reconnect the same website after a couple of minutes’ rest. If you access, the error has been fixed. If still showing the same error, you need to try the step given below.
Flush DNS Manually – Check Method Below
Occasionally, the cache memory of your DNS becomes outdated and you have to flush it by using command prompt so that it starts working smoothly once again. Follow the below steps to do so.
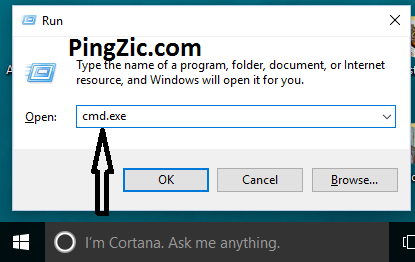
- Go to the “Start Screen” and press “Windows + R” keys. The Run box will appear. Type here “cmd.exe” to open command prompt.
- Once Command Prompt appears before you, type “ipconfig /flushdns”.
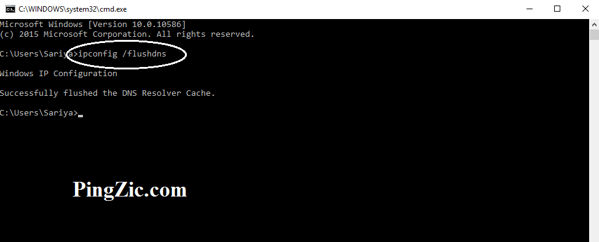
- Now wait for a while and then reboot the system complete the process.
- Try to access the site once again to make sure the problem has gone to the bin.
It is pretty good if you are successful. If you are still facing the same problem, move to the step below.
Use Any Other Device with the Same Network
You need to identify the fault by checking the network. Connect it with any other system to check your network. When connected, try to access the same website to check whether it is accessible or not. If it is connected, it means your first system is creating this problem.
Restart Router or Modem
You need to unplug the cable of the router/modem and let them take rest for half a minute to clear up the memory. Now connect the cables to them and let them establish the connection fully. It may resolve the problem. You should try to access the same website. If it is still not accessible and showing the same error, you need to try the next step.
Use Any Other Browser
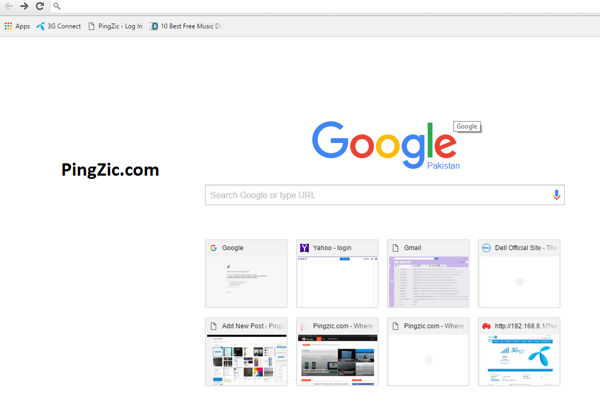
A prompt way you can use to analyze the connection is to try to access the same website in any other browser. If you are using FireFox Mozilla, you should try Google Chrome this time. Let’s see if you are successful in opening the site. If it is so, it means the problem is in the previously used browser that can be troubleshooted by changing the proxy settings.
Amend the DNS Server Settings
You need to change the settings of your DNS Server and you can do it manually. You need to add any other server so that it may establish the connection without error.
- You need to press “Windows” key to show the Search Bar. Now type “ncpa.cpl”
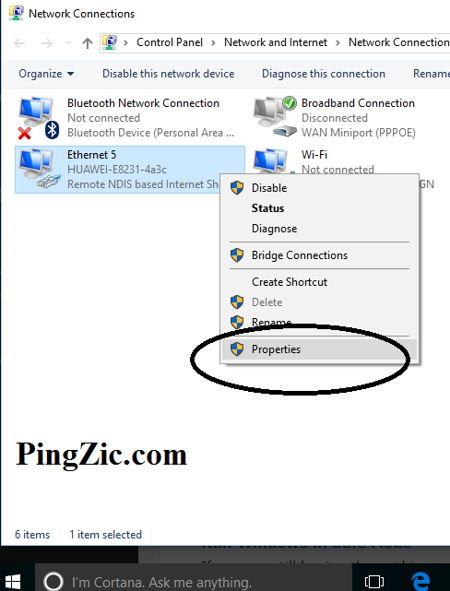
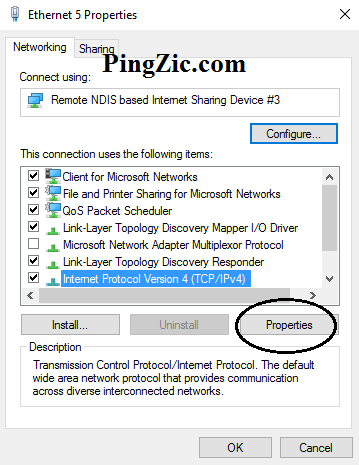
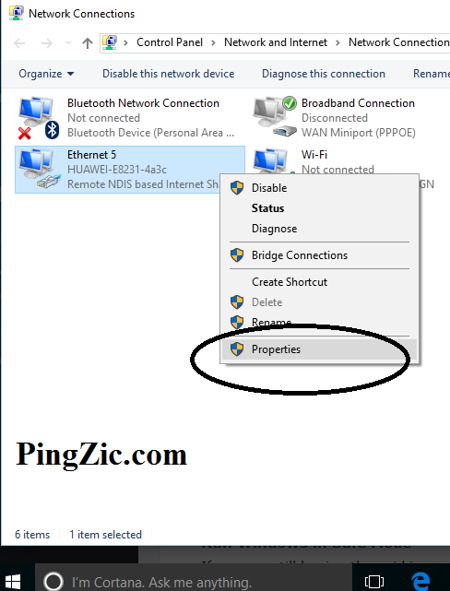
- You will be in “Network Connections” setting once again. Here, you will see the connection you are using. Right-click on it to view the menu where you have to select “Properties” from the list.
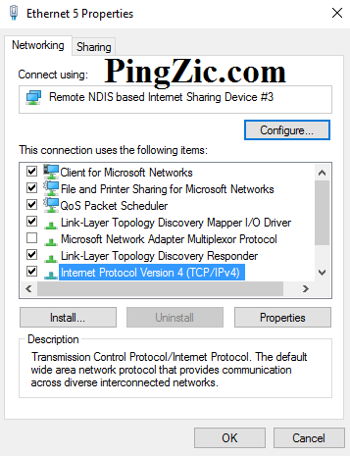
- It will take you to the “Properties” section where you will see Internet Protocol Version 4 i.e. IPv4 in the list. Select it and click “Properties” option to view its properties.
- Here, click the radio button “Use the Following DNS Server Addresses”. In the“Preferred” one you should type 208 . 67 . 222 . 222 and in “Alternate” one you should type 208 . 67 . 220 . 220 and press “OK” to save the changes.
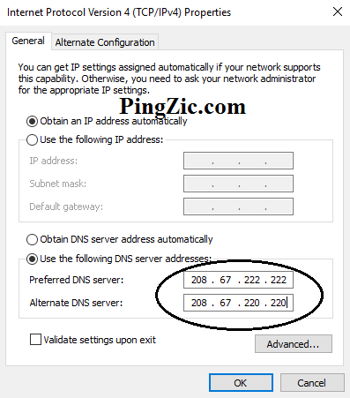
- It is an Open-source service by OpenDNS and you can use it to fix this error.
Run Windows in Safe Mode
If you are still having the said issue, you should restart your system in Safe Mode. When your system is running in Safe Mode, it will show you only necessary files of Windows and you can evaluate the actual cause of the problem. It will make you identify the software or additional antivirus that can cause this error. Follow the guide below to do so.
Restart your system and keep pressing F8 key to show the options.
Now select the option “Safe Mode.” and while your system is in Safe Mode, you need to connect the network once again. If it is working well, you can evaluate all of the startup programs where you need to disable the program one followed by the other to find out the actual cause behind this error.
Troubleshooting of the Modem
If you are using a WiFi network, you need to stop it on the system. Plug-in the system to modem by using an ethernet cable. Now try to connect. If the website is not accessible, it means the error is due to the internet service and you should contact the Internet service provider to ask them about this error.
Change the Physical Address
- You can also fix this issue by changing the physical address of your domain name system server.
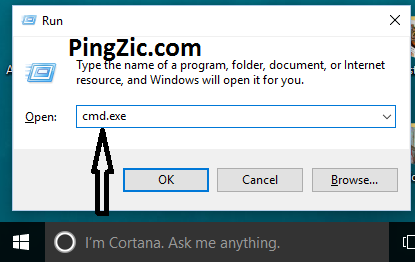
- Press “Windows + R keys” to open Run box. Type here “cmd.exe” to open Command Prompt.
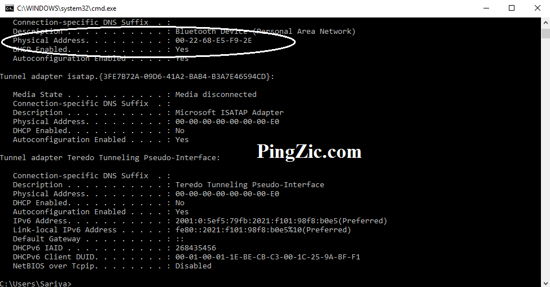
- Type “ipconfig /all and press “Enter.” Now it will show you the information where you need to look for “Physical Address”. Note it down to use further.
- Now come to the Start Screen and press Windows key to show Search bar. Type here “ncpa.cpl” to view Network Connections.
- Right-click on the network connection and select its “Properties.”
- Select here “Configuration” to proceed further.
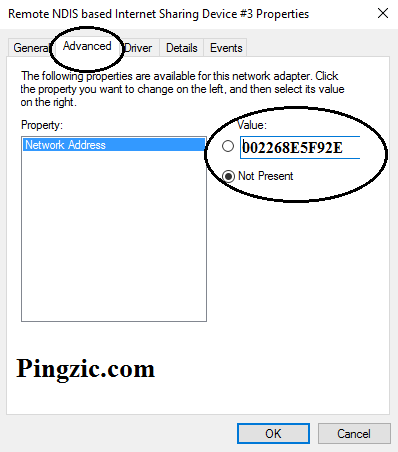
- Now select “Advanced” tab. Here you will see a category “Value” where you need to enter the physical address you got from Command Prompt. Click “OK” to save the changes.
- Now try to connect again after rebooting the system. This time, it will work for sure.
Resetting of DNS Server
- In case, the above-mentioned methods do not work, you should reset the DNS by using Command Prompt.
- Press Windows + R keys to open run box where you need to write “cmd.exe”

- It will take you to the command prompt window. Now type here the following commands and after typing every command you should press Enter.ipconfig /Flushdns
ipconfig /registerdns
ipconfig /release
ipconfig /renew
netsh winsock reset
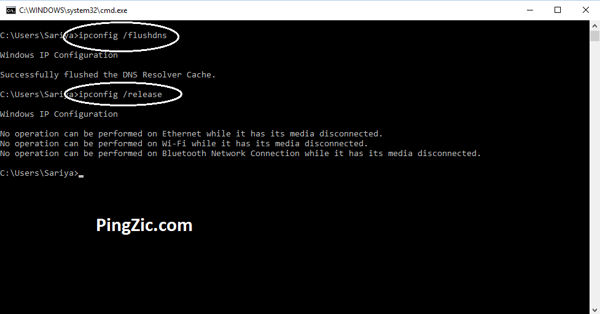
- Once you have given all of the above-mentioned commands, you need to close the command prompt and reboot the system. It will solve the issue for sure.


